Worldwide
 España
 France
 Italia
 USA
USA Colombia
 Россия
 Schweiz
 Deutschland
 Panama
 Holland


Tatami Puzzle Assembly
Preliminary information:
- After opening the package, air the product for at least 24 hours before the use;
- To avoid future deformations of the product, assembly the area in free spaces and keep at least 10cm away from fixed points (walls, columns, ...);
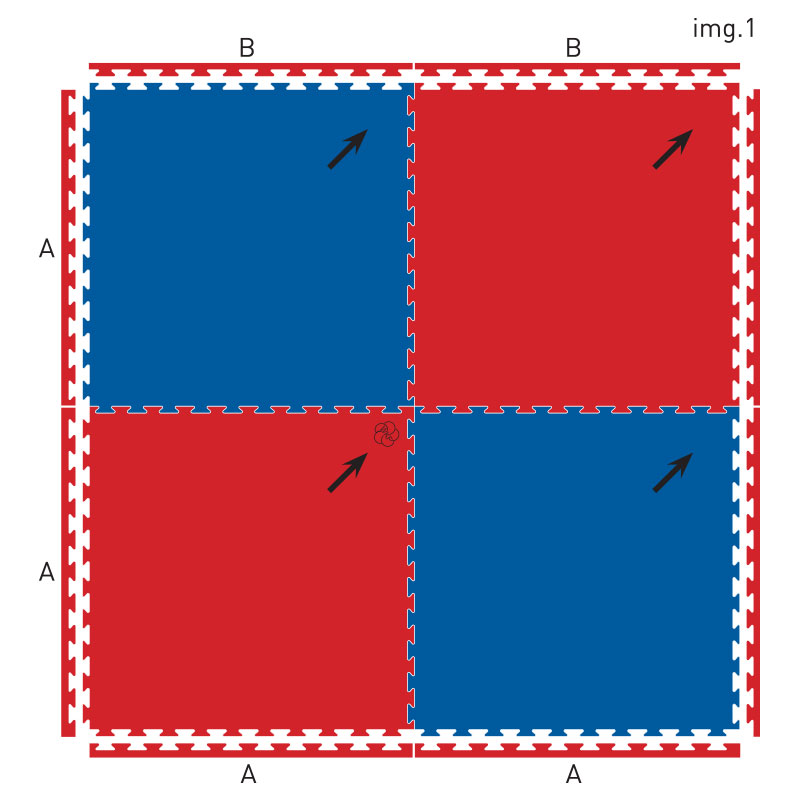
Tatami area assembly (See diagrams below)
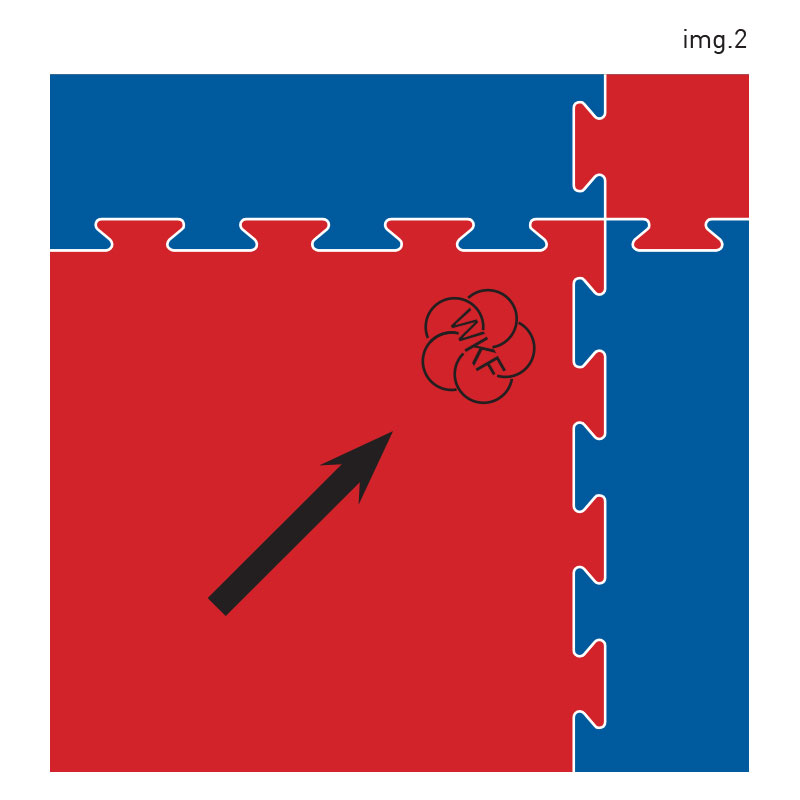
- Begin assembly from a corner of the room or area;
- Keep as a reference the single joint in the shape of an Arrow (See image 2);
- All the modules must have the same reference (Ex Img.1: if for the first piece the arrow is at the top right, for all the following the position to be kept will always be at the top right);
- The Tatami is reversible, just keep the position listed above;
- The area can be completed with the perimeter edges, using the same color (Ex: either all red or all blue).
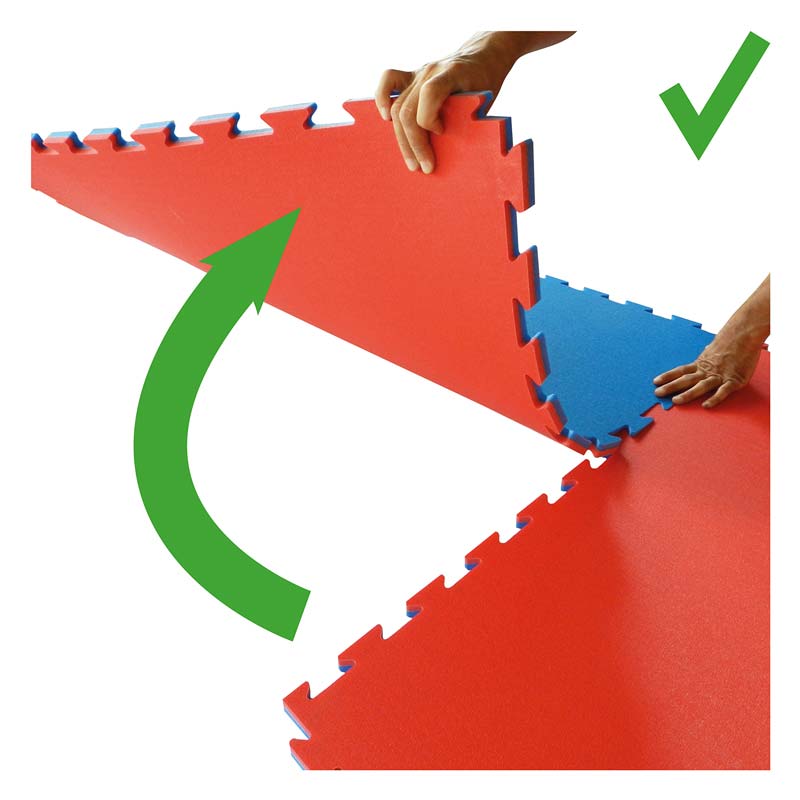
Tatami Puzzle Disassembly
The best method, to avoid damaging the product, is the “BY CUT” disassembly (as shown in the figure).
WARNING! Carefully avoid folding the tatami on itself during disassembly; this causes the teeth or the inner layer of the product to break.

Traditional Tatami Assembly
Transport the product keeping it STRAIGHT avoiding folding it;
Carefully place the Tatami on the ground, avoiding to drag it
AVOID contact with pointed or sharp objects and surfaces.